
The only 8 git commands you'll ever need (and why git command line is superior).
I've been a git advocate for 10 years, and like it or not its the standard for any sort of version control. Over the years I've used many different GUI applications to interact with my git repositories, but I keep coming back to the command line. As a bonus I'll go over a couple tools and setup tips to make your command line experience more palatable.
What is git
Git is a distributed version-control system for tracking changes in any set of files, originally designed for coordinating work among programmers cooperating on source code during software development. Its goals include speed, data integrity, and support for distributed, non-linear workflows
Simply put git helps you keep track of changes to your code.
Git command line vs gui
There are a plethora of git graphical user interfaces (GUI), SourceTree, GitHub Desktop, TortoiseGit, GitKraken and on and on and on... Chances are everyone has a difference preference, has tried multiple, has a compelling reason why to use it over another which is rooted in it being "easier", I'll address this later. The downfall of each of these is that its unlikely that two different companies will be supporting the same one, and the one they support is unlikely to be the one you're used to which brings me to my first reason for using the command line.
Using the command line never changes
Every single git GUI is different, the buttons are in different places, the way it represents merges, commits, pushes, branches are all represented differently, so naturally there is a learning curve to using a new one. There are also bugs, quirks, and limitations to what a git GUI can do. The command line never changes, it is constant, every single git command always works the same. Better yet access to the command line is there if there is a git GUI installed. Even better yet, you can utilize all the power of git without being restricted by the functionality of a GUI.
The command line is actually easier
Now we're getting to the meat of things, the reason all these git GUIs exist is to make the git experience more visually pleasing, not really to make it easier. People shy away from learning commands and having to memorize things when there is a way to do it with just a button, and looking at the git docs I see why....
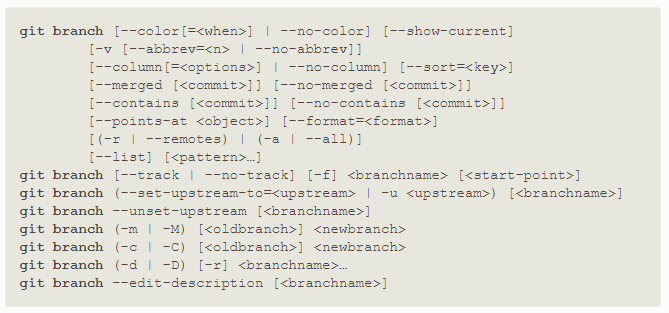
All that for the branch command? in all the years of using git I've used only used branch with one option, I think. In the remainder of this post I'm going to give you the only git commands you'll need to do 99.9 % of your tasks and just a couple to be aware of. These once you know these I guarantee your interactions with git will be easier, less confusing, and more enjoyable.
The only 8 git commands you'll ever need
If you don't want a long explanation of the commands I've put a condensed tldr; at the bottom.
First Let's make sure git is installed and find the command line
Feel free to skip this part if you already know git is installed and you can access the command line.
First open your command prompt or terminal, and type
git --version
you should see a result of something like
git --version
git version 2.27.0.windows.1
if you do, yay you have git installed, if you don't, don't worry we can easily install it by downloading it here and following the installation instructions.
git clone
So let's start at the beginning, chances are you'll be working with an existing repository (repo), either you've just created the repo (in github for example), or you're starting work in an already established code base. So you'll need to clone (download) the repository to your local computer.
git clone [address to repo]
make sure you leave out the brackets, and that's it, the repo is now downloaded on your local machine, and you can browse to it with your preferred code editor.
git checkout -b
We've cloned a repo, and are ready to make some changes! We'll want to make a branch first, a branch is how you make code changes, test them, and not mess up anyone elses work (or lose your own). It's a best practice to make a branch BEFORE you make any changes, but if you forget, don't worry using git checkout -b will move any uncommitted changes to the new branch. Remember to name your branch something useful, you or someone else might have to come back to it, having a descriptive title can save you from having to look at the code.
git checkout -b new-branch-name
git add .
Our code is branched, we've made some changes. Now we add the changes with git add. The add command has a ton of options and there is lots you can do with it, but if you use git add . (with the period) it will add all the changes you've made. The downfall of using git add . is that you can add unnecessary files to your repo. Make sure you have an appropriate .gitignore file before using git add . you can find a collection of .gitignore templates here
git add .
git commit -m
Now that we've added our changes, we need to commit them, git commit -m commits your changes and adds a commit message, its a best practice to add a commit message that describes the changes you've made.
git commit -m "Changes font color from red to blue"
git push -u
Changes have been made, we're ready to push it up from our local machine to our remote repo. We do this with git push -u, -u is short hand for --set-upstream. We use it like this git push -u origin branch-name. There may be cases where origin will not me the name of the remote, but I've never encountered one.
git push -u origin new-branch-name
git checkout
We've already covered git checkout! Well not totally, like all git commands branch behaves a little different based on the options given, or in this case lack thereof. In this case we're going to switch to another branch that already exists. Normally you're going to be switching between your branch and a main branch, usually called master, or main, but you can use it to switch to any branch.
git checkout main
git pull
Git pull satisfies two scenarios
- We need to pull someone elses branch down from the remote repo.
- We need to update a branch that we have, but there has been changes made to it and pushed to the remote repo.
git pull
git rebase -i
Rebase is an important command. Lets say you branch off main, and make some changes. While you are making your changes another person pushes up a change to the main branch. Well now the version of main that you have is out of date. This is where rebase comes in, it allows you to rebase a branch off of a different branch (or an updated version of that branch). The -i option stands for interactive. The way to use rebase seems more complicated, but its just using the same commands we've already talked about, and the process is the same every single time you use it. So instead of issuing one command you just issue 3. In the snippet below I've explained how to use rebase with notes to make it as clear as possible.
// first we make a new branch
git checkout -b new-branch
// we make some changes to the code, add and commit like normal
git add .
git commit -m "changes font color from red to blue."
// its at this point we realize there has been a change to our main branch in order to merge this change in we're going to have to rebase
// so we switch back to our main branch
git checkout main
// we pull the latest version of main
git pull
// we switch back to our branch
git checkout new-branch
// we rebase on the new version of our main branch
git rebase -i main
git push -f
Another version of git push you might need to use is git push -f (git push --force) you use this when you would want to overwrite your previous push to the remote. For example, if you have already pushed a change, but you cannot merge it because there has been a change to your main branch which requires a rebase. You would follow the rebase steps above, then use git push -f to overwrite your previous change in the remote repo.
// we're currently on our new-branch and we need to rebase but we've already used git push -u origin new-branch
// so we follow the normal rebase steps
git checkout main
git pull
git checkout new-branch
git rebase -i main
// once rebased if there are any changes you will need to git add and git commit
// you can see if there are changes by using
git status
// git status will tell you if there are any changed files that need to be added or committed
// assuming we have some changed files
git add .
git commit -m "rebases off updated version of master"
git push -f
This may seem overwhelming but this step utilizes all the commands you need to know if you can remember this series, and what each step does, congratulations you can now use git in the command line and have freed yourself from the bonds of a GUI.
TLDR;
Additional notes
git command docs
My preferred windows console emulator cmdr
Git alias' I use
git config --global alias.co checkout
git config --global alias.br branch
git config --global alias.rbi 'rebase -i'
I will go over merge conflicts in a later blog post, when addressing merge conflicts the default mergetool is vim which isn't difficult to learn but its not intuitive. I use kdiff3 as my mergetool and difftool I've pasted the setup below that I've lifted from this stackoverflow question.
git config --global merge.tool kdiff3
git config --global mergetool.kdiff3.path "C:/Program Files/KDiff3/kdiff3.exe"
git config --global mergetool.kdiff3.trustExitCode false

git config --global diff.guitool kdiff3
git config --global difftool.kdiff3.path "C:/Program Files/KDiff3/kdiff3.exe"
git config --global difftool.kdiff3.trustExitCode false